#100DaysOfCode - Day 94: Adora's Blog Deployment
4 mins
Hi friends!
I’ve wanted to make some more code posts, but it admittedly feels wrong having just left/dropped any documentation on #100DaysOfCode (I can guarantee that I’ve been coding… it’ just been at work)!
So, I wanted to pick that back up with this post from a few days ago. I’ve been working on CI (Continuous Integration) stuff for both my Jekyll blog, as well as our family’s jekyll blog here, which now is fully automated via Github actions.
For the family blog, the deployment has been a bit of a challenge because it contains hundreds of high resolution images, and is likely near or approaching 1 GB in size. So naturally, the CI process would be quite burdensome to transfer that many files every time.
Resolutions
- Originally, I thought I’d fix this by doing some sort of scaling down of images, but even with this, it would be far too much to transfer every time.
- Finally, I realized that having a server that tracks previous state, and only updates changes from that previous state, is best. This required setting up the blog on a linux server, and setting up a CI to auto-pull, and build (differences) on that site when it’s updated.
- The best way to do this is through Github Actions, which are essentially pre-defined deployment specs, that pre-define the type of Github virtual machine you want running your actions, as well as deal with a lot of the technicalities of the actions (such as running a linux based
sshcommand from the virtual machine’s terminal, in this case). - With actions, I discovered action-ssh, which allows me to pass some arguments to run simple SSH commands. It seemed to work pretty well for what I needed, but SSH has a bug that didn’t let me SSH into my server using the
ssh servername:portnumbernotation, and it needed to be formatted usingssh servername -p portnumber. The update to use this more supported format was completed in a fork of the action in this repository by ian-whitestone, so that’s what’s referenced below.
- The best way to do this is through Github Actions, which are essentially pre-defined deployment specs, that pre-define the type of Github virtual machine you want running your actions, as well as deal with a lot of the technicalities of the actions (such as running a linux based
To use actions in your github project, you simply add a .yml file in 2 nested subfolders on your project root, such as .github/workflows/action.yml.
Within that action.yml file, you want to start with some boilerplate code that describes the code being run, as well as sets the triggers that cause the action to run (in this case, it’s a push to main):
name: Linux Local CI/CD
on:
  push:
    branches:
      - main
Then, you define the jobs that are ran after that trigger, such as in this case, deploy_by_pulling_via_ssh, which runs on a linux (ubuntu) server, then uses the ian-whitestone/action-ssh action, and takes its arugments in everything after with:
jobs:
  deploy_by_pulling_via_ssh:
    name: Build and Deploy Job
    runs-on: ubuntu-latest
    steps:
    - name: Execute SSH commmands on remote server
      uses: ian-whitestone/action-ssh@master
      env:
        NAME: "Root"
      with:
        hosts: 'root@ochsners.us'
        port: '905'
        privateKey: $
        debug: true
        command: 'cd /var/www/adora; git pull; pwd; sudo bundle install; sudo bundle exec jekyll build --trace'
The bulk of it is in this bash command, which runs after it’s connected to my web server:
cd /var/www/adora;
git pull; 								# Pull the files
pwd;  									# Show the current directory
sudo bundle install; 					# Use bundle to install new packages
sudo bundle exec jekyll build --trace	# Build the static html files
And there you have it! Success, and it’s impressively quick.
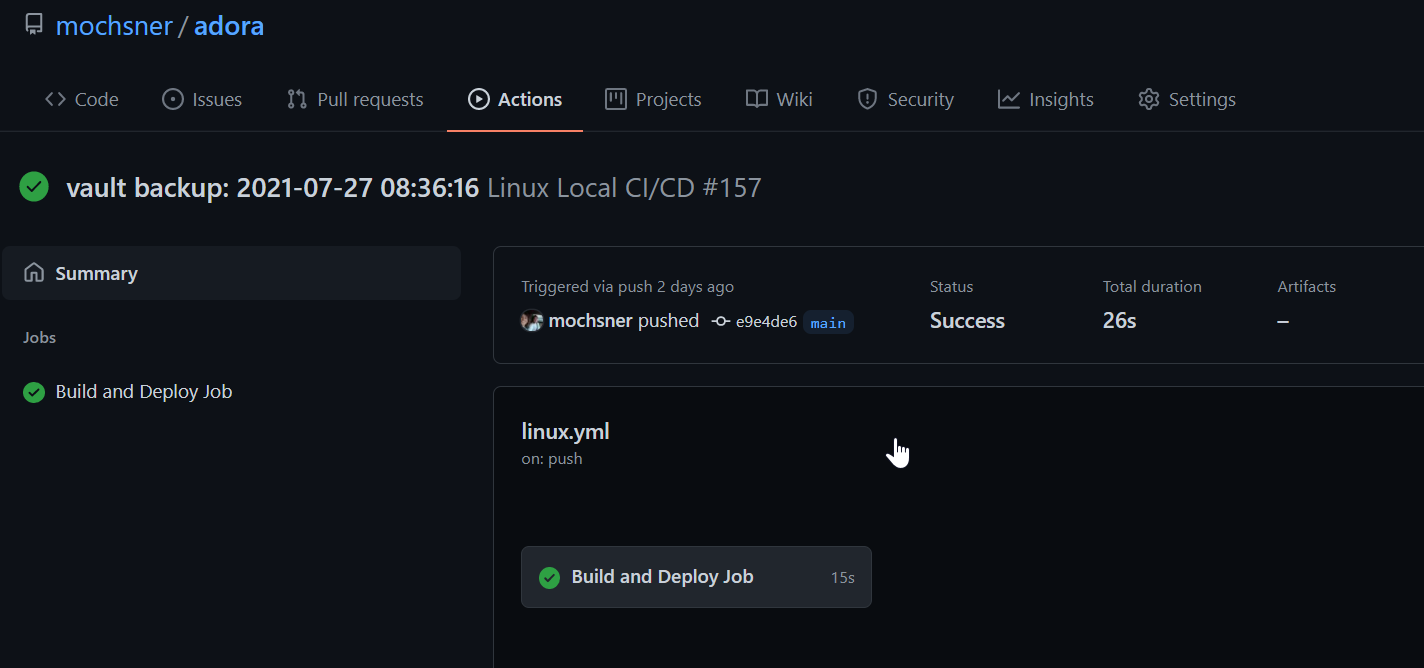
One thing you might notice as well is the “vault backup: 2021-07-27 08:36:16” message, which is an automated commit message generated by the wonderful note and markdown editor Obsidian.md. I’ve started using it with my wife for our family blog, and I’ve just recently decided to try it on my blog as well – definitely liking it so far!
Happy coding!
~Marc